Showing posts with label pillow. Show all posts

8.07.2012

Union Jack Pillow


We love the Olympics around here. Very very much. And thank goodness we now have a Tivo like the rest of the world and can record (yes I still say 'tape' instead of record - I am working on it. Mostly due to my husband's sarcastic comments). I had great plans to make a large blanket for Emmett that said London 2012 and had london themed prints picked out. And it didn't work. Couldn't get a pattern that I liked. So I decided to make a pillow instead.

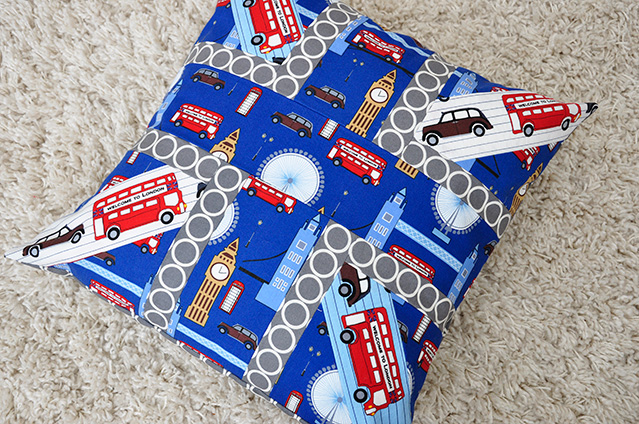
Using the Union Jack flag as inspiration I came up with this:


I guess it is really my first true quilt block. While I've made 'quilts' I haven't made blocks that require multiple pieces and then put together, aside from some simple rectangles. It is pretty satifsying seeing the finished results.


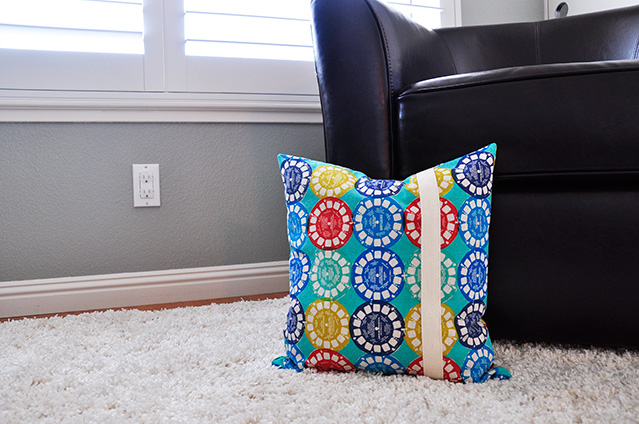
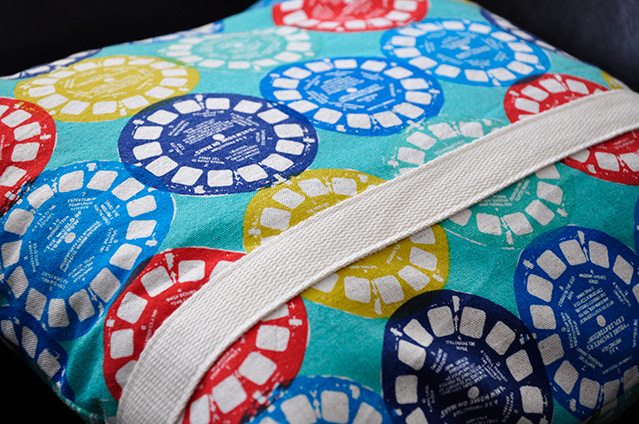
On the back I just used Pewter Metro Rings to match the front with an envelope closure. Easy. Simple.


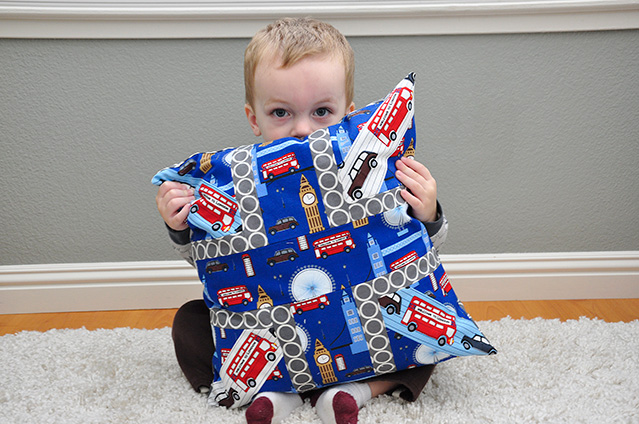
Emmett likes it, which is good. Mostly to point out the buses and clocks. Silly boy.


And synchronized swimming is happening right now. So excited! Love how they walk out onto the deck, so funny! Although NBC likes to cut that part off, thank goodness that the BBC is doing live streaming without any editing. And I am loving the underwater cam they use so that we see what they're doing at the same time as seeing what is going on on top of the water. But I digress.

7.15.2011

A Blanket and Pillow for Jack


I made this pillow and blanket for a fantastic woman that I have met on Etsy, who also has a fun blog, its too bad that we don't live in the same city as I know that we would get along. I hope she doesn't mind me sharing what I've made!

 
Her son's name is Jack so we decided to have his name on the front of the minky blanket with some stripes.


And then a matching stripe on the pillow.


So bright and so fun for her toddler. Perfect for those afternoon naps. I hope he likes it, she told me that he helped pick out the fabric :)

5.20.2011

Giraffe Pillow


Here it is, the last pillow for The Bubb's room, well for now at least! I had some left over yellow giraffe fabric and made a simple case with an overlap slot on the back. In retrospect I think that I would have put chunky white piping on it. But I'll have to save that idea for another project!


And they're a good size in the crib too, although Emmett doesn't sleep with pillows yet.

5.18.2011

Monogrammed Pillow


Continuing on with the pillow making for Emmett's room, I have now completed the 3rd pillow (I have 4 in case you are wondering how many I am making). I decided that I needed to have some piping on this one AND a zipper. So not really knowing what I was doing, these are the steps that I did to make it. I am sure there is a better way to install a zipper and piping?

1. Cut out two squares of fabric to fit your pillow. I used this cute little car fabric by Kokka and some men's suiting material for the back.
2. I then cut out a big car to match the little cars to applique on the front, but decided that it didn't look good. So instead I cut an "E" out of black fleece to monogram the pillow. I used Lite Steam-A-Seam and adhered it to the fabric. I thought about top stitching it but didn't see the point as it is permanent and fuzzy so you really wouldn't notice the stitching anyway.
3. Installed the red piping on the "front" of the pillow.
4. Installed the invisible zipper, first on the front side and then to the back.
5. Open the zipper and then sewed the two panels together rights sides facing.
6. Flip the pillow, stuff, and I was done!


Pillows are very addicting to make :) And the best part is I remembered to put the zipper on the bottom this time, hooray!


5.02.2011

Elephant Pillow


I have finished the second pillow for Emmett's room. And for whatever reason the zipper took forever to install, I just wasn't focusing...and the worst part is, I put it on the top instead of the bottom of the pillow, I am so annoyed at myself! Things to remember not to do next time :) Anyway other than the zipper fiasco I am really pleased with how it turned out.


I love love LOVE this elephant fabric by Daiwabo called Tiny Tip Top in Lime Green on Ivory. I actually wanted the orange version but it is sold out everywhere. I like all the colors that the fabric comes in: blue, yellow, gray, etc. And it comes in the reverse colors as well. I thought it would be cool to do the pillow with green elephants on one side and then ivory elephants on a green background on the other side, but alas they were sold out of that color too!!


Anyway so I used a 12x16 pillow form and an invisible zipper on top. To add some additional interest I put "stampede" on one side of the pillow. I cut it out of dark brown felt and then ironed it on using lite steam-a-seam. I was going to top stitch them down (or applique I guess you could call it) but didn't see the point really as the steam-a-seam is permanent.


I love the brown felt against the elephants and how The Bubb is interested in the felt texture.


So 2 pillows down and 2 more to go!

4.29.2011

Viewfinder Pillow


Well I am still working on decorating The Bubb's room and I have just finished the first pillow! Yeah! I have secretly been wanting some of this Viewfinder in Blue fabric from the Ruby Star Rising Collection by Kokka, so when Evan said he liked it when we were at Hart's fabric, I finally got to get some :)

I have had some pillow forms sitting around for a while and just haven't had the time to get started. But yesterday I had an hour or so to work on something for "us" so I decided to seize the moment. I selected the 14" square pillow form, really it turned out to be 14" x 15" and figured out how I was going to construct the pillow case. I was going to do a zipper, but then decided I wanted to try the overlap slot in the back instead. I cut the front to be 14.75" by 15.75" and then cut two pieces for the back, each measuring 15.75" and since I only had a half yard of fabric, I think it turned out to be about 8.5 inches the other way. (I didn't actually measure). So I fold over one edge of the 15.75" by 8.5" piece (I folded the 15.75" side) by about 3/8 of an inch and pressed it down. I did this to the second 15.75" by 8.5" piece too. Then I sewed  it down to create a hem so the fabric wouldn't fray.


For some additional interest I bought a piece of canvas strap (not sure the name) but it is found with all the fun ribbon/lace/piping/etc. that is cut by the yard at the store, to attach to one side of the pillow.


I positioned it on the large piece of fabric (the front) and sewed it down. From here I just pinned the three pieces together right sides facing. Then stitched all the way around, flipped, and was done. I put the pillow in to try it out and it amazingly fit. So excited!


11.11.2010

i ♥ pillows


Making these pillows turned out to be way more satisfactory than I would have thought. I love my pillows! I ended up using four zippers (3 shortened to 14 inches, and 1 standard 22 inch), 3 yards of fabric, thread, and a lot of patience to make three 16 inch pillows and one 27 inch.  But here they are and I am so happy with them!


Trying them out in the family room.


The Bubb trying out the large pillow.


11.08.2010

Pillow Preview

I bought a couple of different fabrics a few weeks ago with the idea to redo the pillows for our family area couches.  There are 3 little ones and one big one.  I decided to challenge myself on this project and use invisible zippers, as I could just enclose the pillows without zippers and then cut them off the next time I want to redo the pillow covers.  So I bought only one zipper to see how it goes before I do the three others.

Pillows before:


The first finished pillow:


Zipper Installation:


The Bubb's Approval:


Related Posts Plugin for WordPress, Blogger...